How to Change MySQL Root Password in Ubuntu 20.04
Passwords are hard to remember, so if you have forgotten the MySQL root password, luckily, there is a way to change it. This post has been written for you, and by the end of this post, you will have successfully changed the password of MySQL.
Before getting straight to the solution, it is assumed that you are using the latest version of the MySQL database on Ubuntu 20.04 LTS system. This post will provide a step-by-step guide on how to change MySQL root password in Ubuntu 20.04. So, without wasting any time, let’s start.
Step 1: Check the version of MySQL on Ubuntu 20.04
First of all, check the version of your MySQL because this post contains the solution of changing the root password on version 8 or higher. If the version of your MySQL is lower than 8, then the solution will be different. The command for checking the version of MySQL is given below.
MY LATEST VIDEOS

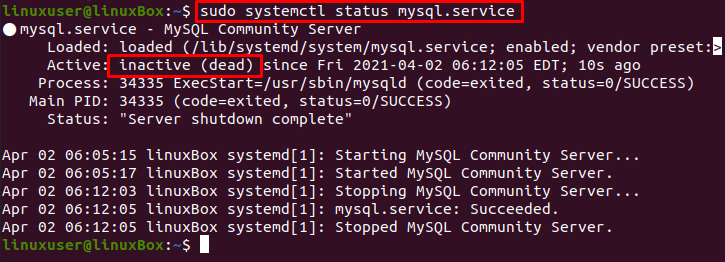
Step 2: Stop the MySQL server
To change the MySQL root password, you first need to shut down the MySQL server, and you can do so using the command:
![]()
Check the status of the MySQL server to verify using the command:
Step 3: Skip Grant Tables & Networking
To start the MySQL server without granting the tables and networking check, set the environment variable MYSQLD_OPTS which MySQL uses on startup.

Alright, the environment variable is set, and we can login to the MySQL shell without providing any password.
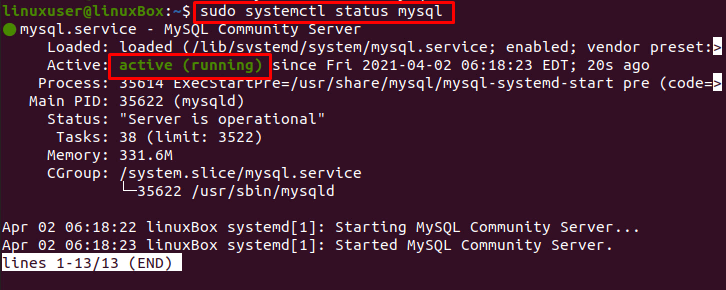
Step 4: Start the MySQL service
After setting the environment variable MYSQLD_OPTS, start the MySQL service now using the command:
Step 5: Confirm the status of the MySQL Server
Confirm the status of the MySQL service, either it is running or not:
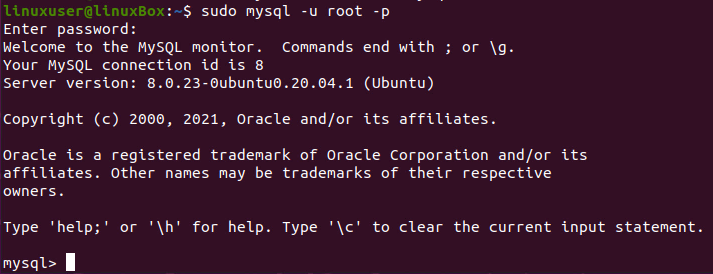
Step 6: Sign In to the MySQL shell
Now, you need to login as a root user to the MySQL server and for signing in to the MySQL shell, type the command:
Without providing any password, you will log in to the MySQL shell.

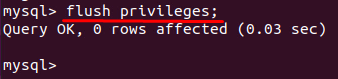
Step 7: Alter the root password
Now, flush the privileges first.
Select the MySQL database.

And set the new password for the root user using the Alter command by typing the following statement.

At the place of “the-new-password” provide your new password. After successfully changing the MySQL root password, log out from the MySQL shell.

Step 8: Kill all MySQL processes & Restart the MySQL service
First of all, kill all the processes of MySQL before even restarting the MySQL server.
![]()
After having the output as shown in the picture, hit “Enter” and restart the MySQL server using the command given below.
Step 9: Log in with newly set Password
Now, Log in to the MySQL shell with the newly set password.
![]()
Provide the recently set password in the ALTER command.
This is it. MySQL’s root password is successfully changed, and you are logged back into the MySQL shell.
Wrap Up
In this step-by-step guide, you have learned to change the MySQL root password on the Ubuntu 20.04 LTS system. This post contains a profound and easy-to-understand solution on reset the root password of MySQL on Ubuntu 20.04.
Sumber : https://linuxhint.com/change-mysql-root-password-ubuntu/
